NestJS Microservices in Days, Not Months: API Gateway, Keycloak SSO & Docker Without the Rebuild
How teams ship NestJS microservices faster — API gateway, Keycloak SSO, RabbitMQ, Redis, Docker Compose, and Kubernetes — without spending months building infrastructure from scratch. See what a production starter kit changes.
- NestJS
- Microservices
- Docker
- Keycloak
- Starter Kit
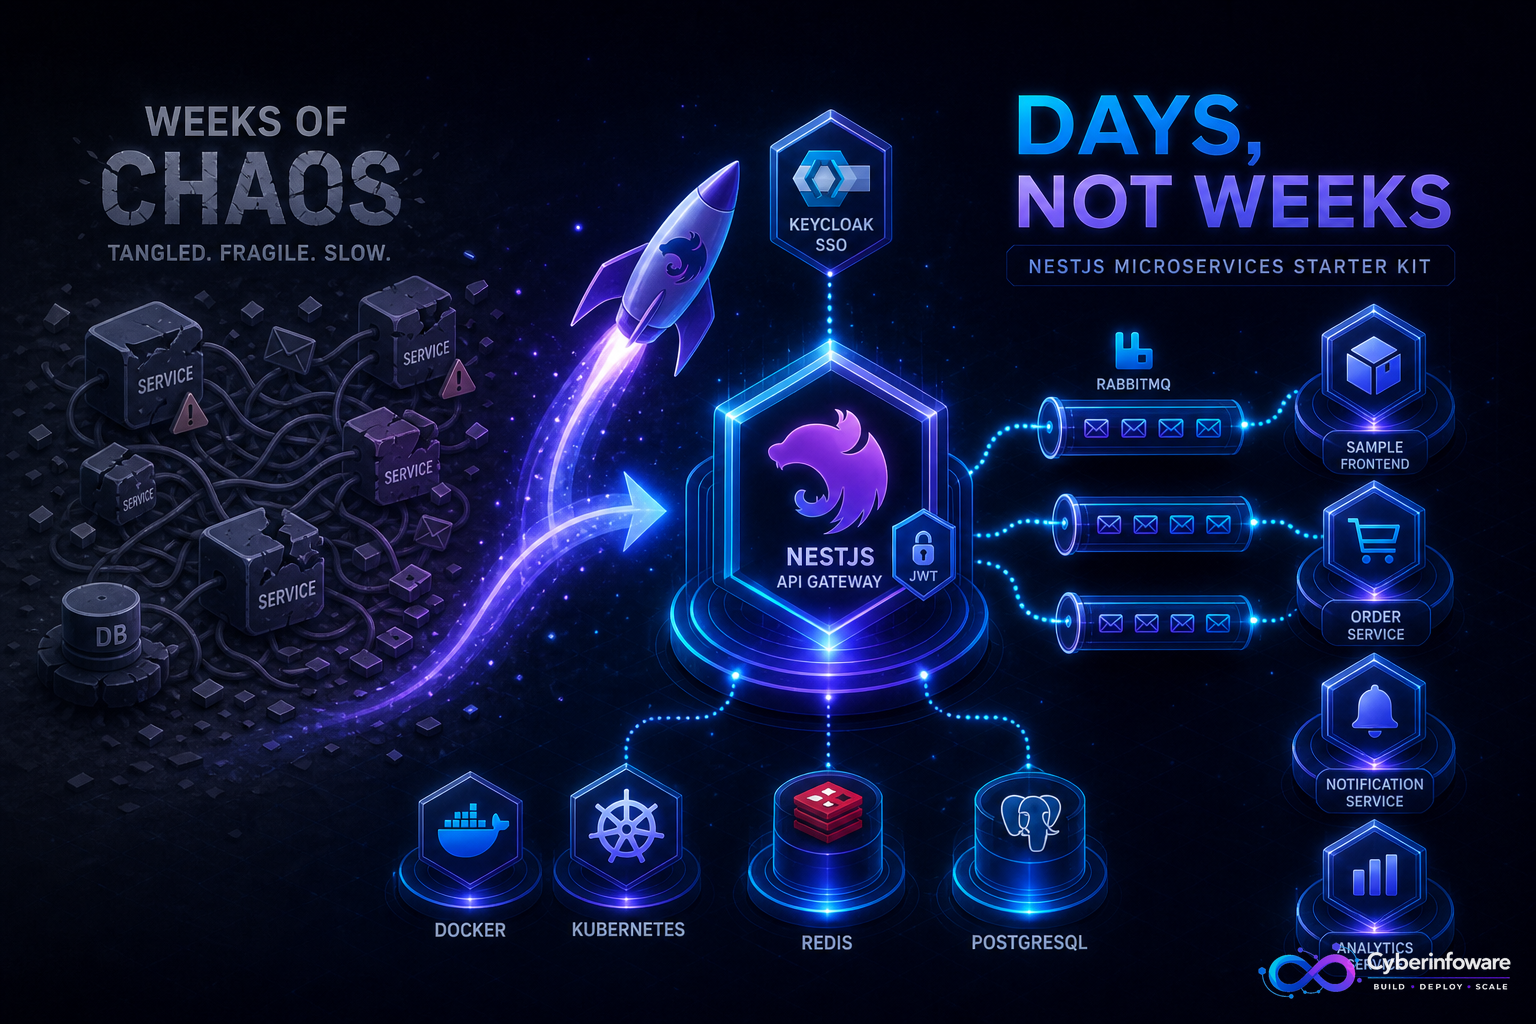
Most teams do not fail at NestJS microservices because NestJS is hard. They fail because infra glue eats the calendar: gateway JWT checks, Keycloak realms, RabbitMQ exchanges, Compose networking, health probes, and Kubernetes manifests — all before the first product story ships.
This article is for founders and tech leads searching how to ship NestJS microservices faster. It maps the weeks you typically lose building from scratch — and how a production NestJS Microservice Starter Kit compresses that path into days of setup and customization.
The real timeline nobody puts on the roadmap
- Stand up an API gateway and decide how JWT roles flow across services.
- Configure Keycloak (or equivalent SSO) with clients, realms, and redirect URIs that actually work locally.
- Wire RabbitMQ publishers/consumers with retries — not a fire-and-forget demo.
- Make Docker Compose run five+ processes with healthy dependencies.
- Add Kubernetes manifests and CI so each service can deploy independently.
- Only then: catalog, orders, or your real domain.
If your first month is still "make microservices boot," you are paying senior rates for commodity platform work.
What "days, not months" actually requires
Speed is not a thinner README. It is an integrated stack you can clone, configure, and verify with a real request path:
- API gateway — single front door with JWT validation
- Keycloak SSO — OIDC/OAuth2 ready for local and staging
- RabbitMQ — at least one publish/consume flow that survives restart
- PostgreSQL + Redis — persistence and cache without shared-monolith ambiguity
- Sample UIs — something to click while APIs stay honest
- Docker Compose + Kubernetes — local today, cluster tomorrow
A practical first-week plan with a starter kit
- Day 1 — Bring Compose up; confirm Keycloak login and gateway health.
- Day 2 — Trace one sync API through the gateway into a domain service.
- Day 3 — Trigger the RabbitMQ notification path; confirm consumer ack/retry behavior.
- Day 4 — Replace sample domain names with your bounded contexts.
- Day 5 — Point CI at one service; dry-run a Kubernetes manifest in staging.
Signals you are still on the "months" path
- Auth is still a custom user table "until we add SSO later"
- Events are HTTP callbacks between services with no broker
- Only one Dockerfile, and "Kubernetes later" is undefined
- No sample client — Swagger alone is the UX
When to buy Starter vs step up to SaaS kits
- Starter — you need NestJS microservices foundations (gateway, SSO, events, deploy) without billing/tenancy yet
- Professional — you need multi-tenant SaaS (per-tenant DB, billing, Admin) with simpler ops in one API
- Enterprise — you need the SaaS control plane as microservices with service-per-database isolation
Bottom line
NestJS microservices are a delivery model — not a badge. If your goal is a running gateway, SSO, events, and a deploy path this month, start from an integrated kit and spend engineering time on your domain. Compare packages on cyberinfoware.com/products or contact us to match Starter, Professional, or Enterprise to your roadmap.
Explore Cyber Infoware packages
Production NestJS SaaS foundations with commercial licensing — pick the architecture that matches your team.
- NestJS Microservice Starter Kit
Production NestJS microservices — API gateway, Keycloak SSO, RabbitMQ, Docker, Kubernetes, and Terraform.
- Enterprise SaaS Microservices Boilerplate
Full multi-tenant SaaS control plane as NestJS microservices — service-per-DB, billing, audit, notifications.
- Multi-Tenant SaaS Boilerplate
Best-seller NestJS multi-tenant SaaS boilerplate — one API, per-tenant databases, billing, and Keycloak SSO.